Here we will set up the MVC framework in our FirstAppDemo application. We will proceed by building a web application on top of the ASP.NET Core, and more specifically, the ASP.NET Core MVC framework. We can technically build an entire application using only middleware, but ASP.NET Core MVC gives us the features that we can use to easily create HTML pages and HTTP-based APIs.
To setup MVC framework in our empty project, follow these steps −
- Install the Microsoft.AspNet.Mvc package, which gives us access to the assemblies and classes provided by the framework.
- Once the package is installed, we need to register all of the services that ASP.NET MVC requires at runtime. We will do this inside the ConfigureServices method.
- Finally, we need to add middleware for ASP.NET MVC to receive requests. Essentially this piece of middleware takes an HTTP request and tries to direct that request to a C# class that we will write.
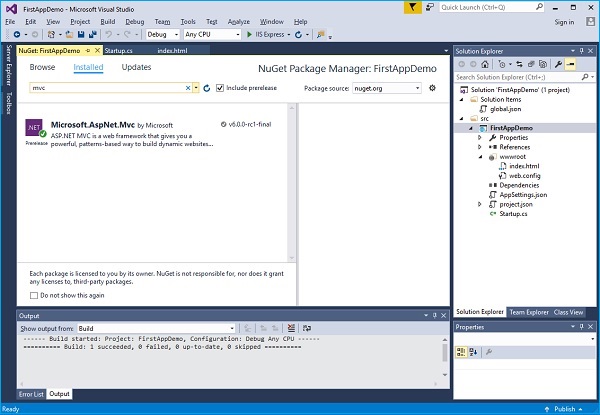
Step 1 − Let us go to the NuGet package manager by right-clicking on the Manage NuGet Packages. Install the Microsoft.AspNet.Mvc package, which gives us access to the assemblies and classes provided by the framework.
Step 2 − Once the Microsoft.AspNet.Mvc package is installed, we need to register all the services that ASP.NET Core MVC requires at runtime. We will do this with the ConfigureServices method. We will also add a simple controller and we will see some output from that controller.
Let us add a new folder to this project and call it Controllers. In this folder, we can place multiple controllers as shown below in the Solution Explorer.
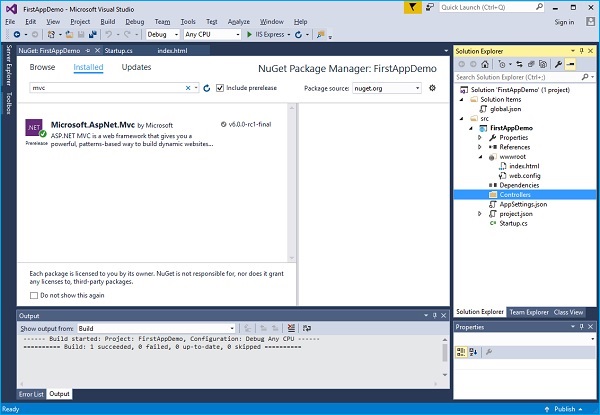
Now right-click on the Controllers folder and select on the Add → Class menu option.
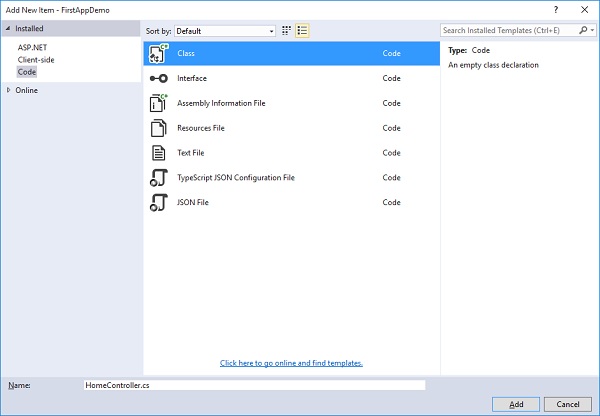
Step 3 − Here we want to add a simple C# class, and call this class HomeController and then Click on the Add button as in the above screenshot.
This will be our default page.
Step 4 − Let us define a single public method that returns a string and call that method Index as shown in the following program.
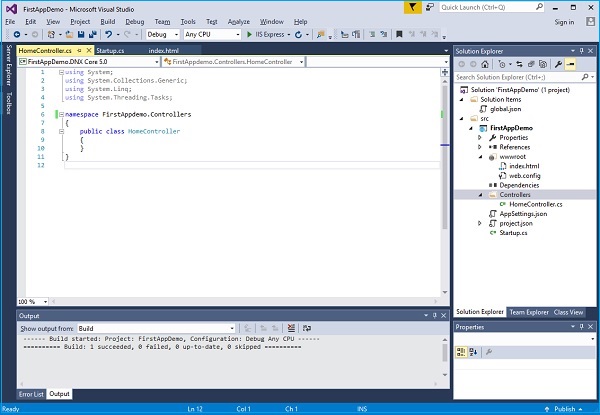
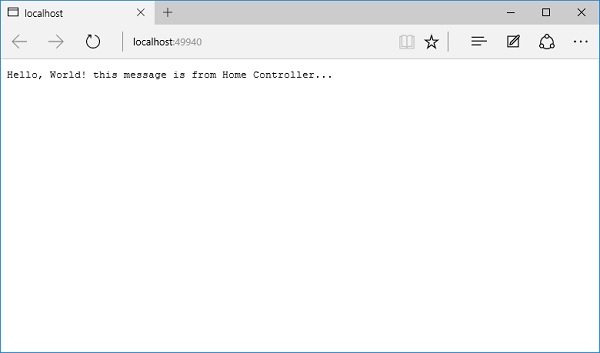
using System;
using System.Collections.Generic;
using System.Linq;
using System.Threading.Tasks;

namespace FirstAppdemo.Controllers {
   public class HomeController {
      public string Index() {
         return "Hello, World! this message is from Home Controller...";
      }
   }
}
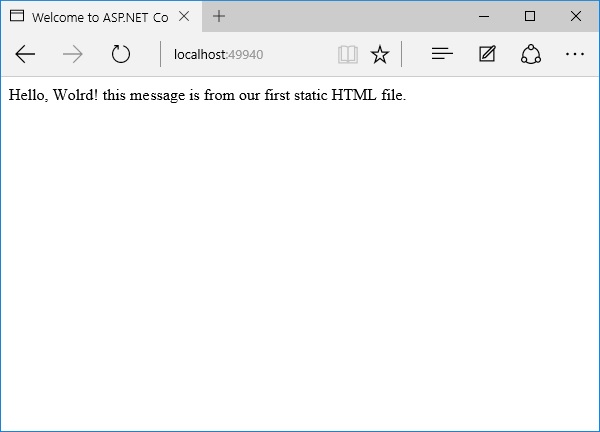
Step 5 − When you go to the root of the website, you want to see the controller response. As of now, we will be serving our index.html file.
Let us go into the root of the website and delete index.html. We want the controller to respond instead of index.html file.
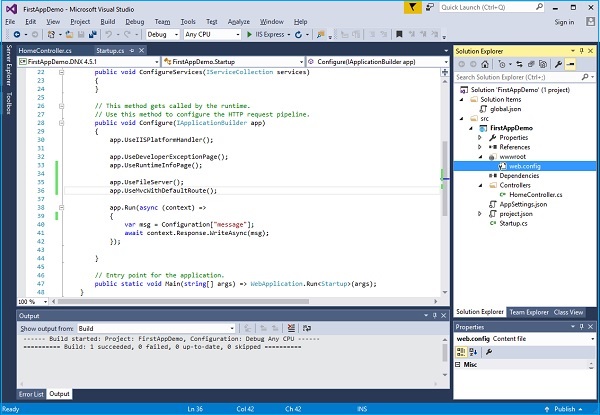
Step 6 − Now go to the Configure method in the Startup class and add the UseMvcWithDefaultRoute piece of middleware.
Step 7 − Now refresh the application at the root of the website.
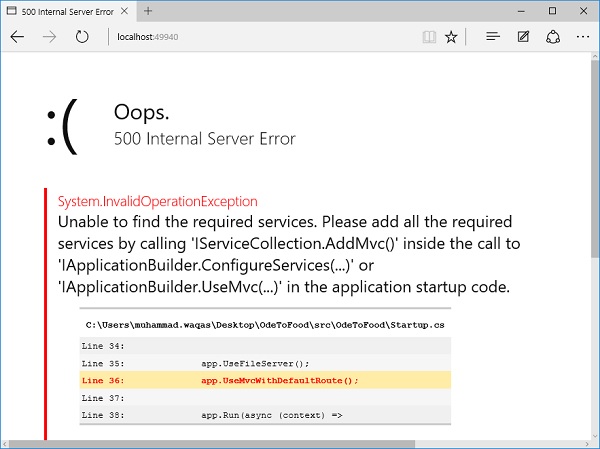
You will encounter a 500 error. The error says that the framework was unable to find the required ASP.NET Core MVC services.
The ASP.NET Core Framework itself is made up of different small components that have very focused responsibilities.
For example, there is a component that has to locate and instantiate the controller.
That component needs to be in the service collection for ASP.NET Core MVC to function correctly.
Step 8 − In addition to adding the NuGet package and the middleware, we also need to add the AddMvc service in the ConfigureServices. Here is the complete implementation of the Startup class.
using Microsoft.AspNet.Builder;
using Microsoft.AspNet.Hosting;
using Microsoft.AspNet.Http;

using Microsoft.Extensions.DependencyInjection;
using Microsoft.Extensions.Configuration;

namespace FirstAppDemo {
   public class Startup {
      public Startup() {
         var builder = new ConfigurationBuilder() .AddJsonFile("AppSettings.json");
         Configuration = builder.Build();
      }
      public IConfiguration Configuration { get; set; }

      // This method gets called by the runtime.
      // Use this method to add services to the container.
      // For more information on how to configure your application,
      // visit http://go.microsoft.com/fwlink/?LinkID=398940
      public void ConfigureServices(IServiceCollection services) {
         services.AddMvc();
      }

      // This method gets called by the runtime.
      // Use this method to configure the HTTP request pipeline.
      public void Configure(IApplicationBuilder app) {
         app.UseIISPlatformHandler();

         app.UseDeveloperExceptionPage();
         app.UseRuntimeInfoPage();

         app.UseFileServer();
         app.UseMvcWithDefaultRoute();

         app.Run(async (context) => {
            var msg = Configuration["message"];
            await context.Response.WriteAsync(msg);
         });
      }

      // Entry point for the application.
      public static void Main(string[] args) => WebApplication.Run<Startup>(args);
   }
}
Step 9 − Save the Startup.cs file and go to the browser and refresh it. You will now receive a response from our home controller.
Comments
Post a Comment